Wiki
Searchable • Contextual • Onboarding
☰ Wiki sections
Purchase Invoice
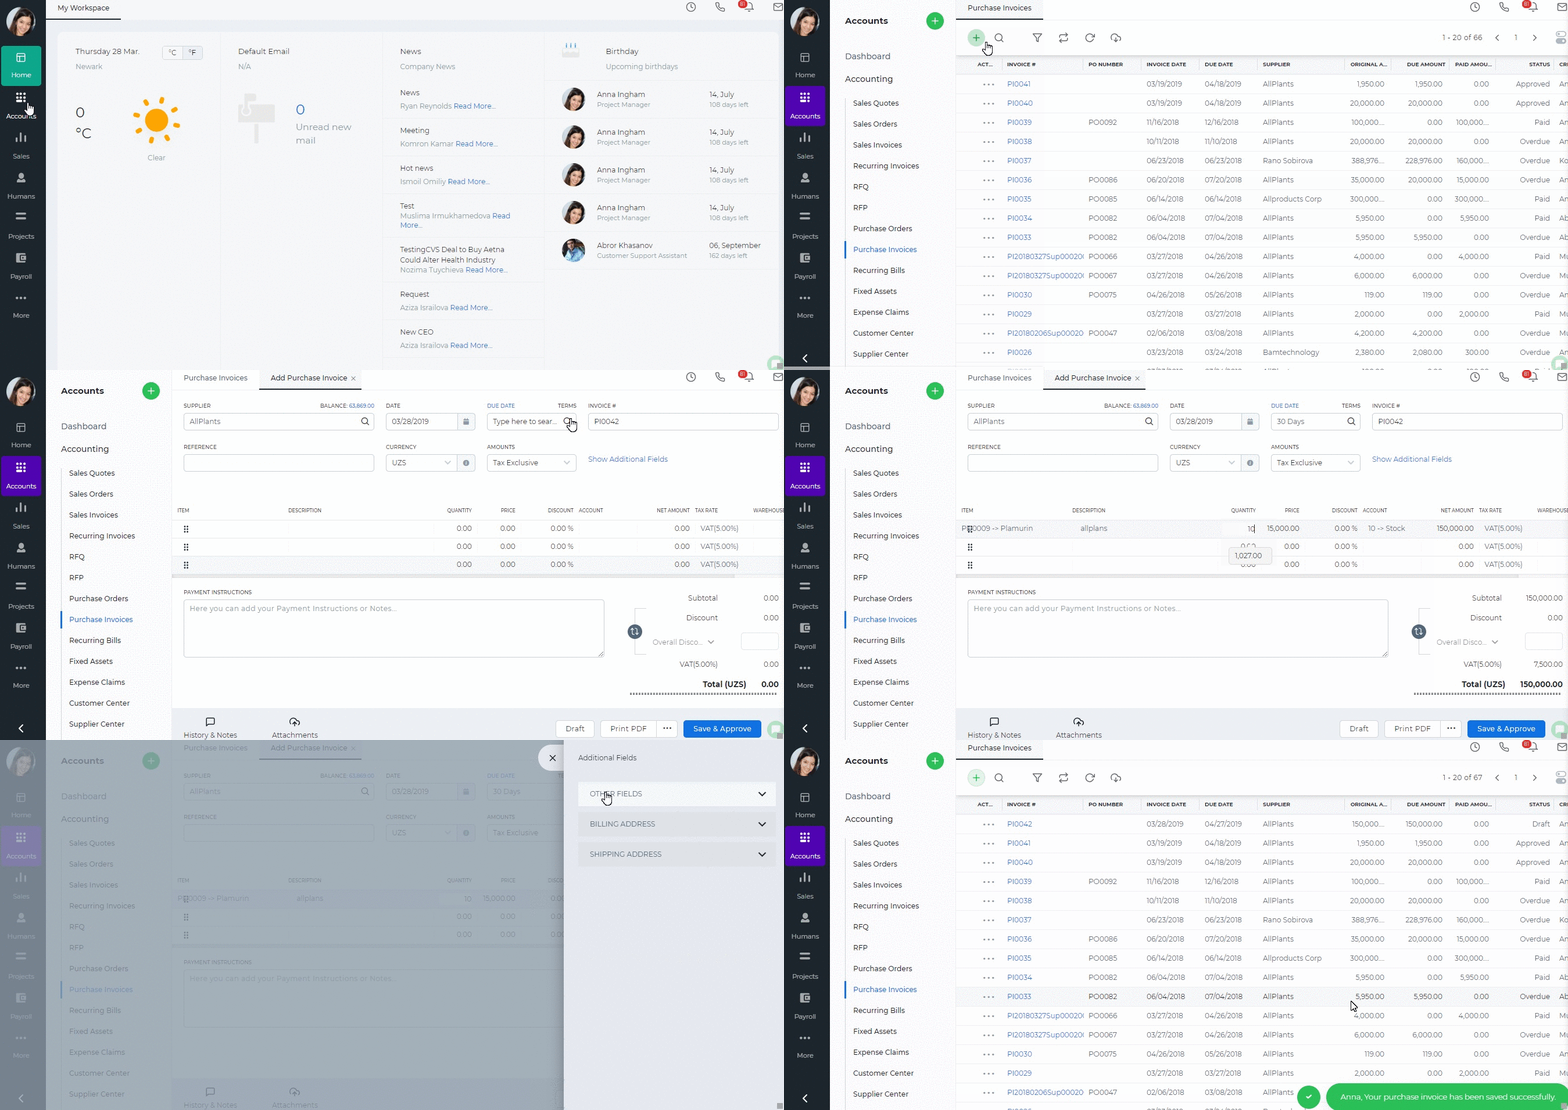
Go to Accounts>>Purchase Invoice list and click on the plus button to add a new Purchase Invoice.
- Supplier– Choose a company or an organization or a person you are sending an order from the list of Suppliers. You can also lookup the suppliers from the search box. If there are no suppliers registered in your company you can add new Supplier from Add new link just in the Supplier dropdown.
- Date– Indicate the date Purchase Invoice is created (Transaction will be registered on this date in your General Ledger).
- Due Date– Indicate the Due Date which you need to pay for bill.
- Invoice #– Enter the number of the Purchase Invoice. You can put here the number of the invoice that your supplier send you. Alternatively, you can set up automatic numbering in Accounts Settings.
- PO Number – if you have converted the Purchase Invoice from Purchase Order the number of the purchase order will be set here or you can add manually while creating the new Purchase Invoice.
- Amounts – Select the type of applying taxes (Tax Exclusive or Tax Inclusive).
- Item – Title of the product or service, required field. You can select from existing products/services or type here not listed items.
- Description – Description of the product which can be editable.
- Qty – Enter the quantity of the product or services.
- U/M – You can specify the unit of measurement.
- Price – Cost price of the product or services
- Discount – Enter the discount percentage.
- Asset Acc. – Enter an expense or asset type General Ledger (GL) account for bookkeeping purposes.
- Net Amount – Net amount displays the amount after applying the discount.
- Tax Rate – Choose the tax rate from the tax rate dropdown menu. Tax rates are applied in percentage.
- Total Amount – The total amount of each line is displayed here.
- Payment Instructions/Notes – Write Payment Instructions or Notes. This will be printed in PDF version of the Purchase Invoice.
- Show Additional Fields – It will open more fields to specify in your invoice like Billing Address, Custom Fields, Accounts Payable, and other fields.
Once you have filled all required fields, you can print the PDF version, Save and Approve or save it as Draft.

Created by Aziza Israilova,
April 2019
See also
- Purchase Order for Fixed Assets
- Goods Delivered Notes
- Sales Quote
- Sales Order
- Sales Invoice
- Recurring Invoice
- Request for quote
- Request for purchase
- Purchase Order
- Recurring Bills
- Fixed Assets
- Company Expense Claims
- Employee Expense Claims
- Customer Center
- Supplier Center
- Products & Services Overview
- Bank Accounts
- Supplier Access
- VAT Reverse Charge Mechanism
- Setting Barcode for a Product
- Items Table
- Run Time Calculation of Exchange gain/loss
- Exporting to Excel and PDF
- Timesheet Invoice
- Budget per Department
- VAT Return
- Bank reconcilation
- Dividends Payable
- Assembly Products
- Add New Assembly Item
- What is Non-Inventory Item?
- Add New Non-Inventory Item
- FIFO method of inventory valuation
- What is Inventory Item?
- Add New Inventory Item
- Products/Services Import
- Add New Product/Service
- Intercompany Purchases
- Creating Intercompany Sales Invoice
- Intercompany Sales
- Workflow of Expense Claims
- Purchases / Bills Overview
- Timesheet based Invoice
- Progress Invoicing
- How to convert Sales Quote to Order, Invoice & Project
- Sales Overview
- Serial Numbers
- Accounting Overview
- Landing Cost
- Mark PO as Open
- Purchase Order Actions
- Receive Purchase Order
- Send Purchase Order
- Importing Customer Accounts


